- 773
- 208
Net Neutrality
If you are not familiar with the term Net Neutrality, I’ll try to quickly get you up to speed.
A few months ago, a law was passed in America that repeals net neutrality. That is, now the provider can legally collect and analyze information about the user's online activities without obtaining consent. In practice, this means that IP addresses will be collected, which can easily be converted to a physical location, a history of site visits and the contents of pages viewed outside of the HTTPS protocol, including information sent via web forms. The Electronic Frontier Foundation (Electronic Frontier Foundation; EFF) believes that Internet service providers can go even further and start selling the collected information to third parties.
Hiding data from the provider with the help of Noisy
To hide the data from the provider, the Noisy utility, which is a simple script written in Python, will help us. It can generate random HTTP / DNS traffic in the background while you visit sites. Thus, your information loses its uniqueness, becomes useless for marketers and companies engaged in the analysis of this kind of information.
The ideas implemented in the Noisy script are not new, and have been extracted from the Squawk tool, which is a script built into web pages for sending additional random requests. However, Noisy is easier to use and modify.
Consider step by step how to work with Noisy.
Installing dependencies
You must have Python installed. In Kali Linux, everything you need is already there by default. Noisy is compatible with versions 2.7 and 3.6. To check the Python version on your system, enter the following command:
Cloning Noisy from GitHub
After Python and all necessary dependencies are installed, load Noisy from the repository using the git command:
Download the archive from the repository
Introduction to the configuration file
Now you need to edit the configuration file. Despite the fact that for Noisy to work correctly, changing the settings is not required, along the way we will be able to figure out how the program works. First, go to the directory with the unpacked archive using the cd command:
The information in the file is stored in JSON format. Noisy takes the first address from the “root_urls” list and waits for a random time in the range between “min_sleep” and “max_sleep” (in seconds) before clicking on a random link on the page. The viewing depth is specified in the max_depth parameter. After completing the page views on the current site, the next address from the list is taken, and so on.
When visiting sites, the content is not shown on the screen, but it may attract the attention of someone who is monitoring the local network or if browsing these sites is prohibited by the proxy server settings. In short, edit this list at your discretion. The more addresses are added, the more random the traffic will be.
Since there are few addresses in the config.json file, the entire list will be completed in a very short time. As a result, an identifiable piece of information that can easily be filtered out can potentially appear.
Adding sites to the configuration file
To avoid the above problem, I created an alternative configuration file . I decided that a million addresses would be enough, I downloaded the first million sites from the Alexa rating and drove this list more than five times through the simplest script-randomizer written in Python. The resulting list was copied to the config.json file. Now the traffic generated by the Noisy utility will be more random.
My configuration file of more than 25 MB in size can be downloaded by going to the GitHub page and either right-clicking on the “Download” button and selecting “Save Link As” in the context menu, or clicking on the “Download” button, and then the file contents will load in the browser and you can save the page. After downloading, do not forget to replace the original configuration file in the “noisy” folder.
If you decide to make your own list of sites, remember that the information is stored in JSON format, and each address must be enclosed in double quotes with a comma at the end. In addition, I always add the https: // prefix to first try to access the site via the HTTPS protocol. Example:
" https://website.com ",
Traffic Randomization
After updating the config.json file, you are ready to randomize traffic. Using the cd command, go to the noisy directory and run the noisy.py script with an argument in the form of a configuration file:
INFO: root: Visiting https://azerbaijantourism.az/about
INFO: requests.packages.urllib3.connectionpool: Starting new HTTPS connection (1): azerbaijantourism .az
INFO: root: Visiting https://azerbaijantourism.az/
INFO: requests.packages.urllib3.connectionpool: Starting new HTTPS connection (1): azerbaijantourism.az
INFO: root: Visiting https://azerbaijantour.az/booking -conditions
INFO: requests.packages.urllib3.connectionpool: Starting new HTTPS connection (1): azerbaijantourism.az
To stop a script, press the key combination Ctrl-C.
Other parameters in Noisy
When Noisy is not running, use the h argument or help to familiarize yourself with other options, such as setting the timeout.
noisy.py [-h] [--log -l] --config -c [--timeout -t]
optional arguments:
As mentioned above, you can put Noisy in a Docker-based container with the following command (but first you need to install Docker):
While examining the configuration file, you may have noticed that the delay is set in seconds. This fact means that the shortest delay can be equal to one second, if you configure the configuration like this:
"min_sleep": 0,
"max_sleep": 1,
In some cases this delay may not be enough, such as, for example, in situations where your network a lot of people, and you need to generate large amounts of random traffic.
Using Docker-compose, we can simultaneously run several containers to generate unlimited amounts of traffic. You need to go to the examples folder, build a new image and run the build on the number of containers you need:
As you can see, Noisy is an extremely simple utility, and with some settings, you get an incredibly powerful tool that should become your everyday tool if you care about your privacy.
If you are not familiar with the term Net Neutrality, I’ll try to quickly get you up to speed.
A few months ago, a law was passed in America that repeals net neutrality. That is, now the provider can legally collect and analyze information about the user's online activities without obtaining consent. In practice, this means that IP addresses will be collected, which can easily be converted to a physical location, a history of site visits and the contents of pages viewed outside of the HTTPS protocol, including information sent via web forms. The Electronic Frontier Foundation (Electronic Frontier Foundation; EFF) believes that Internet service providers can go even further and start selling the collected information to third parties.
Hiding data from the provider with the help of Noisy
To hide the data from the provider, the Noisy utility, which is a simple script written in Python, will help us. It can generate random HTTP / DNS traffic in the background while you visit sites. Thus, your information loses its uniqueness, becomes useless for marketers and companies engaged in the analysis of this kind of information.
The ideas implemented in the Noisy script are not new, and have been extracted from the Squawk tool, which is a script built into web pages for sending additional random requests. However, Noisy is easier to use and modify.
Consider step by step how to work with Noisy.
Installing dependencies
You must have Python installed. In Kali Linux, everything you need is already there by default. Noisy is compatible with versions 2.7 and 3.6. To check the Python version on your system, enter the following command:
Code:
python -V
Noisy uses the Requests module, which can be installed with the following command:
In addition, even more benefits from Noisy can be obtained if you install Docker, because in this case you can isolate traffic in a restricted environment as a separate channel. However, the use of Docker is optional.Code:
pip install requests
Cloning Noisy from GitHub
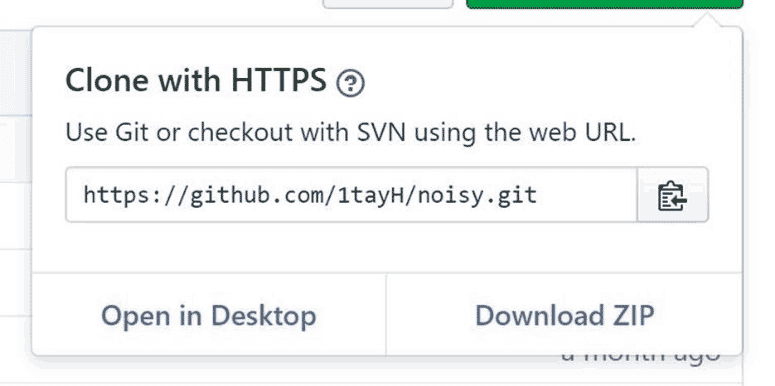
After Python and all necessary dependencies are installed, load Noisy from the repository using the git command:
Alternatively: go to the repository and download the .zip file. First click on the “Clone or download” button and in the opened context menu select the “Download ZIP” item. After downloading, unzip the contents of the archive.Code:
git clone https://github.com/1tayH/noisy.git
Download the archive from the repository
Introduction to the configuration file
Now you need to edit the configuration file. Despite the fact that for Noisy to work correctly, changing the settings is not required, along the way we will be able to figure out how the program works. First, go to the directory with the unpacked archive using the cd command:
Then open the config.json file in your favorite text editor. As an example, use Vim:Code:
cd noisy
Alternatively: go to the “Files” folder on the desktop, and then go to the “noisy” directory and open the config.json file in the Notepad ++ editor.Code:
vim config.json
The information in the file is stored in JSON format. Noisy takes the first address from the “root_urls” list and waits for a random time in the range between “min_sleep” and “max_sleep” (in seconds) before clicking on a random link on the page. The viewing depth is specified in the max_depth parameter. After completing the page views on the current site, the next address from the list is taken, and so on.
As you can see, there are some features associated with the settings. Firstly, there are only 11 addresses in the “root_urls” list. Secondly, there may be problems when visiting some sites in the above list.Code:
{
"max_depth": 25,
"min_sleep": 3,
"max_sleep": 6,
"timeout": false,
"root_urls": [
"http://4chan.org",
"https://www.reddit.com",
"https://www.yahoo.com",
"http://www.cnn.com",
"https://p---hub.com",
"https://www.ebay.com",
"https://wikipedia.org",
"https://youtube.com",
"https://github.com",
"https://medium.com",
"https://thep-----bay.org",
],
"blacklisted_urls": [
"https://t.co",
"t.umblr.com",
"messenger.com",
"itunes.apple.com",
"l.facebook.com",
"КИДАЛА",
"mediawiki",
".css",
".ico",
".xml",
"intent/tweet",
"twitter.com/share",
"dialog/feed?",
".json",
"zendesk",
"clickserve",
".png"
],
"user agents": [
"there are many user agents here!"
]
}
When visiting sites, the content is not shown on the screen, but it may attract the attention of someone who is monitoring the local network or if browsing these sites is prohibited by the proxy server settings. In short, edit this list at your discretion. The more addresses are added, the more random the traffic will be.
Since there are few addresses in the config.json file, the entire list will be completed in a very short time. As a result, an identifiable piece of information that can easily be filtered out can potentially appear.
Adding sites to the configuration file
To avoid the above problem, I created an alternative configuration file . I decided that a million addresses would be enough, I downloaded the first million sites from the Alexa rating and drove this list more than five times through the simplest script-randomizer written in Python. The resulting list was copied to the config.json file. Now the traffic generated by the Noisy utility will be more random.
My configuration file of more than 25 MB in size can be downloaded by going to the GitHub page and either right-clicking on the “Download” button and selecting “Save Link As” in the context menu, or clicking on the “Download” button, and then the file contents will load in the browser and you can save the page. After downloading, do not forget to replace the original configuration file in the “noisy” folder.
If you decide to make your own list of sites, remember that the information is stored in JSON format, and each address must be enclosed in double quotes with a comma at the end. In addition, I always add the https: // prefix to first try to access the site via the HTTPS protocol. Example:
" https://website.com ",
Traffic Randomization
After updating the config.json file, you are ready to randomize traffic. Using the cd command, go to the noisy directory and run the noisy.py script with an argument in the form of a configuration file:
After starting this command, random traffic generation will start. If everything works correctly, you should see the outgoing flow of different addresses as in the example below:Code:
cd noisy
python noisy.py --config config.json
INFO: root: Visiting https://azerbaijantourism.az/about
INFO: requests.packages.urllib3.connectionpool: Starting new HTTPS connection (1): azerbaijantourism .az
INFO: root: Visiting https://azerbaijantourism.az/
INFO: requests.packages.urllib3.connectionpool: Starting new HTTPS connection (1): azerbaijantourism.az
INFO: root: Visiting https://azerbaijantour.az/booking -conditions
INFO: requests.packages.urllib3.connectionpool: Starting new HTTPS connection (1): azerbaijantourism.az
To stop a script, press the key combination Ctrl-C.
Other parameters in Noisy
When Noisy is not running, use the h argument or help to familiarize yourself with other options, such as setting the timeout.
Full list of arguments:Code:
python noisy.py –help
noisy.py [-h] [--log -l] --config -c [--timeout -t]
optional arguments:
- -h, —help help
- –Log -l event logging level
- –Config -c configuration file
- —Timeout -t spider duration in seconds
As mentioned above, you can put Noisy in a Docker-based container with the following command (but first you need to install Docker):
You can even make a build for your Raspberry Pi device with the Raspbian operating system if you want to move the traffic randomizer to a separate place.Code:
docker build -t noisy .
After the build is completed, the launch is performed using the following command:Code:
docker build -f Dockerfile.pi -t noisy .
Increasing random traffic (optional)Code:
docker run -it noisy --config config.json
While examining the configuration file, you may have noticed that the delay is set in seconds. This fact means that the shortest delay can be equal to one second, if you configure the configuration like this:
"min_sleep": 0,
"max_sleep": 1,
In some cases this delay may not be enough, such as, for example, in situations where your network a lot of people, and you need to generate large amounts of random traffic.
Using Docker-compose, we can simultaneously run several containers to generate unlimited amounts of traffic. You need to go to the examples folder, build a new image and run the build on the number of containers you need:
However, in this case, you need to track the amount of generated traffic, because with a large number of working containers, the Internet speed may slow down. In addition, if you have traffic restrictions, you need to carefully monitor how much random data is generated.Code:
cd examples/docker-compose
docker-compose build
docker-compose up --scale noisy=<number-of-containers>
As you can see, Noisy is an extremely simple utility, and with some settings, you get an incredibly powerful tool that should become your everyday tool if you care about your privacy.